
Ask how printed circuit boards are assembled and you will usually hear about four machines: a printer puts solder paste on the pads, a pick-and-place machine sets the components, a reflow oven melts the solder, and an inspection system checks the result. That description is accurate, and it covers perhaps the most visible hour of an assembly job.
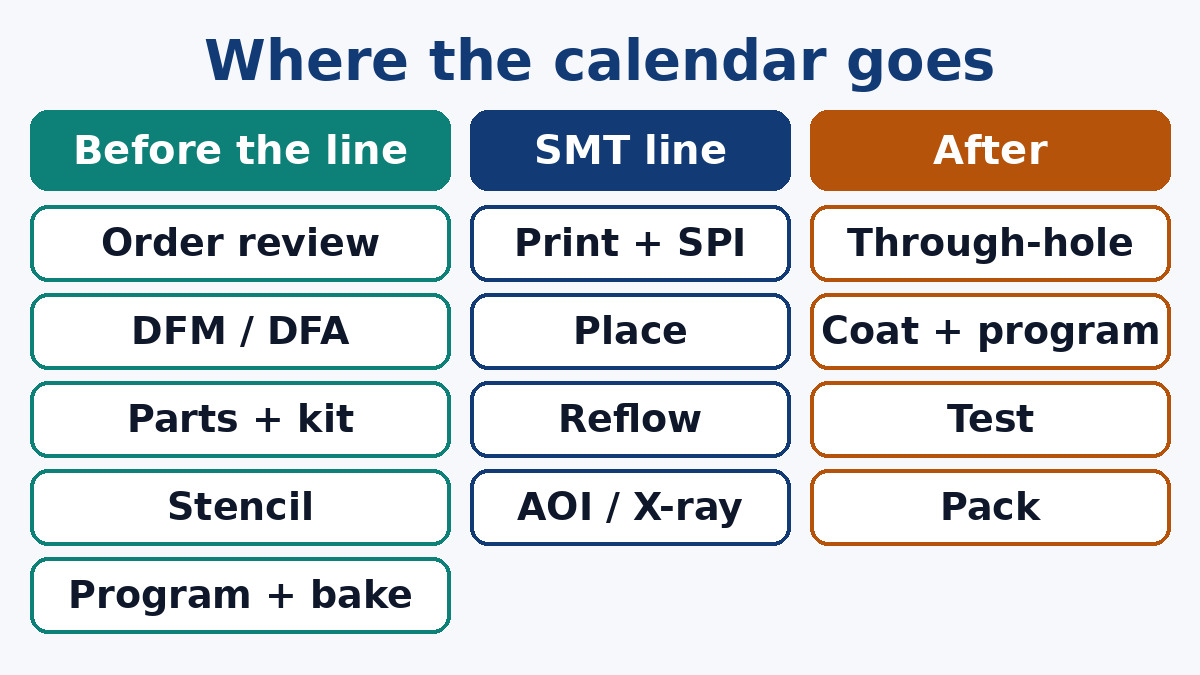
What it leaves out is most of the calendar. Before a board reaches the printer, someone has reviewed your files, checked every line of the BOM, bought or received the parts, ordered a stencil, written the placement program and loaded the feeders. After it leaves the oven, it may still need through-hole parts, cleaning, coating, programming, testing, depaneling and packing. In our Shenzhen factory, when a PCBA job is late or goes wrong, the cause is far more often in one of those steps than on the SMT line itself.
This article walks through the whole PCB assembly process in the order a job actually moves, with most attention on the parts that usually get skipped, and on what you as the customer supply at each step. We have separate guides for the SMT line stations and for inspection; here the goal is the complete picture.
1. Order review: what exactly are we building?
The process starts at a desk. An engineer or project coordinator compares what you sent with what you ordered:
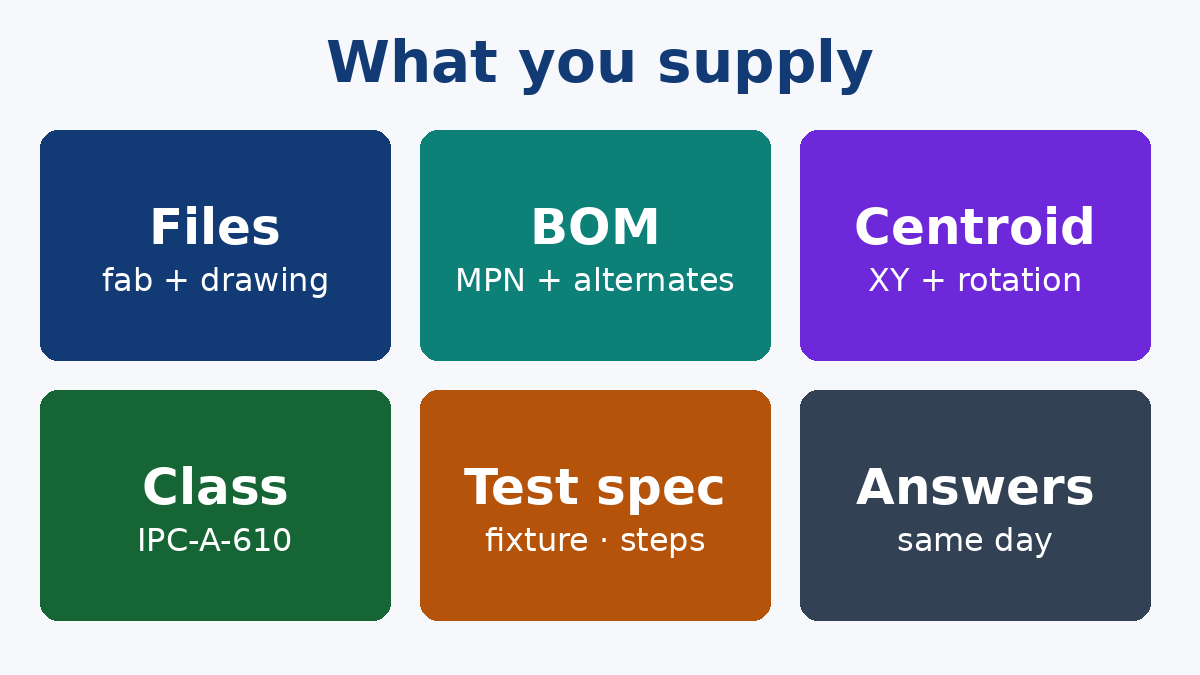
- Fabrication data for the bare board (or confirmation that you are supplying boards).
- A bill of materials with reference designators, quantities, manufacturer names and part numbers.
- A centroid or pick-and-place file giving the position and rotation of each part.
- An assembly drawing showing polarity, orientation and any special instructions.
- The workmanship class (IPC-A-610 Class 2 or 3), test requirements and quantities.
Any mismatch generates a question: a reference designator in the BOM that does not exist on the board, a quantity that does not match the designator count, a polarized part with no polarity mark, a "do not place" line that is ambiguous. Each of these is minutes to fix now and hours to fix on the line. A complete, consistent package is the single biggest thing a customer can do to shorten an assembly job; our Manufacturing Files page lists what we look for.
2. DFM and DFA review
Next the design is checked for manufacturability and assembly: pad sizes against the packages actually being bought, component spacing for placement and rework access, thermal relief on pads connected to large copper areas, fiducials for machine alignment, panel design with rails and tooling holes, and the orientation of parts relative to the direction of travel through wave or selective soldering if through-hole parts are present.
The output is a list of findings with proposed changes. Some are recommendations; some are things we must resolve with you before building, such as a footprint that does not match the purchased part.
3. BOM scrub and component sourcing
For turnkey jobs, where the factory buys the parts, this is often the longest step. Every line is checked against distributor and manufacturer data: is the part active, in stock, available in the packaging the line needs (reels rather than cut tape where possible), and does its package match the footprint? Lines with obsolete, long-lead or allocated parts come back to you with options, such as an approved alternate, a different package or a delay.
Parts are then purchased, ideally through authorized channels, and received through incoming inspection: part number, quantity, date code, packaging and moisture-sensitivity status. Component Sourcing is a service in its own right for exactly this reason; the difference between a well-run and a poorly-run purchasing step shows up as delays, substitutes and, in the worst case, counterfeit parts.
For consigned jobs, where you supply the parts, the same checks happen on arrival: count, identity and condition against your BOM, and a shortage list back to you before the job is scheduled. Most consignment delays come from kits that arrive incomplete or with loose parts that cannot run on a feeder.
4. Stencil and tooling
While parts are being bought, the stencil is designed and ordered from the paste layer of your data. This is where apertures are adjusted: reduced for fine-pitch parts to prevent bridging, windowed for large thermal pads to control voiding, or stepped where a board mixes very small and very large parts. A PCB SMT Stencil is a small cost, but its design has a direct effect on yield.
Other tooling may be needed: support pins or a carrier for thin or flexible boards, selective-solder pallets, and test fixtures if functional or in-circuit testing is part of the job.
5. Programming and line setup
The centroid file becomes a placement program. Engineers assign each part to a feeder position, check rotations against the machine's convention (a frequent source of error, since CAD tools and machines do not always agree on zero rotation), and optimize the sequence. The reflow profile is chosen or developed for the board's thermal mass and the most sensitive component. The AOI program is built from the same data.
Then the line is physically set up: feeders loaded and each reel verified against the program, often by barcode scanning, so that the wrong reel in the wrong slot is caught before the first placement.
6. Material preparation: baking and floor life
Moisture-sensitive components that have exceeded their floor life, or whose dry-pack indicator shows moisture, are baked according to their moisture sensitivity level under J-STD-033. Bare boards that have been stored for a long time or are known to be moisture-sensitive may also be baked. Skipping this step leads to failures that show up much later: popcorning of packages, delamination, or voids.
7. The SMT line
This is the part everyone pictures, and it is well documented elsewhere, so briefly:
- Paste printing through the stencil, followed by solder paste inspection. (Some prototype work uses jet printing instead of a stencil.)
- Placement by pick-and-place machines, from small passives to fine-pitch ICs and BGAs.
- Reflow in a multi-zone oven following the profile set in step 5.
- Post-reflow inspection by AOI, plus X-ray for hidden joints where specified.
For double-sided boards, the sequence runs twice, usually with the lighter side first. A first article is inspected and approved before the rest of the lot runs. Our SMT PCB Assembly page describes the line itself.
8. Through-hole and secondary operations
Connectors, large capacitors, transformers and other through-hole parts are inserted after SMT and soldered by wave, selective soldering or by hand, depending on the board and the mix. Press-fit connectors are pressed. Some parts need manual attention anyway: heavy components glued for vibration, wires, heatsinks, shields.
9. Cleaning, coating and programming
Depending on the flux and your requirements, boards may be cleaned. If conformal coating is specified, areas such as connectors and test points are masked, the coating is applied, cured and inspected. Programmable devices are loaded with firmware, either before placement or in-circuit afterwards.
10. Test
Electrical test checks what the eye cannot: flying probe or in-circuit test for opens, shorts and values; functional test, using your fixture and procedure, to check the board behaves as designed. Failures are diagnosed, reworked and re-inspected before they rejoin the lot.
11. Depaneling, final inspection and packing
Boards built in an array are separated by routing, scoring or punching, carefully, because bending a panel can crack ceramic capacitors near the edge. Final quality inspection samples the finished lot against the agreed class. Boards are then packed in ESD-safe packaging, with moisture barrier bags and desiccant where needed, labeled, and shipped with the documentation you asked for.
Where the time goes, and what you control
If you look at the steps above, the SMT line is rarely the bottleneck for a typical order. The steps that most often decide the delivery date are:
- Order review and DFM, which depend on how complete and consistent your package is.
- Component availability, which depends on your BOM choices and whether you have approved alternates.
- Kit completeness, for consigned jobs.
- Answers to engineering questions, which depend on how quickly someone on your side replies.
None of these are machine problems. They are information problems, and most of them are in the customer's hands. A buyer who sends a clean package with a BOM that lists alternates for passives and has a named engineer ready to answer questions usually sees a noticeably shorter job than one who sends files and waits.
Turnkey, consignment or somewhere in between
How many of these steps the factory performs depends on the commercial model. In a full turnkey job, the factory handles sourcing, kitting and everything after, and you deal with one supplier for the finished board. In consignment, you supply parts and the factory assembles. Partial turnkey splits the BOM, typically with you supplying a few critical or expensive parts and the factory buying the rest. Turnkey PCB Assembly tends to suit teams without their own purchasing capacity; consignment suits companies that already buy the parts at scale. Either way, the process steps are the same; only the owner of each one changes.
If you are preparing a first assembly order, send the files you have. We will tell you what is missing, what we would ask about in DFM, and which BOM lines are likely to decide the schedule, before you commit to a build.